

How To Put On Bike Handlebar Grips
This article will walk through how to remove and install grips on flat handlebars, including lock-on and skid-on styles. For drop style handlebar tape installation, come across Handlebar Wrapping.
ane
Getting Started
What Tools do I need?
- Repair Stand — holds bike secure for piece of cake piece of work
- HBH-2 or HBH-3 Handlebar Holder — makes work easier
- For lock-on grips:
- Hex wrench
- Torque wrench or driver
- Hex wrench
- For sideslip-on grips, one or more of the following may be required:
- Scissors, sharp knife or razor blade
- Rubbing alcohol or window cleaner
- Compressed air
- Spray adhesive or pilus spray
The handlebar grips on upright or flat confined should non slip or move during the ride. With time, grips tend to expand and will loosen on the bar. It is possible to help the grip bail to the bar using adhesives. Even so, grips volition somewhen wear out and should exist replaced.
Typical handlebar grips use either a slip-on or lock-on method of attachment. Slip-on grips rely on a friction fit or interference fit, in which the grips are stretched around the handlebar. Lock-on grips are designed with a locking collar system, keeping the grips secure until they are completely worn out.
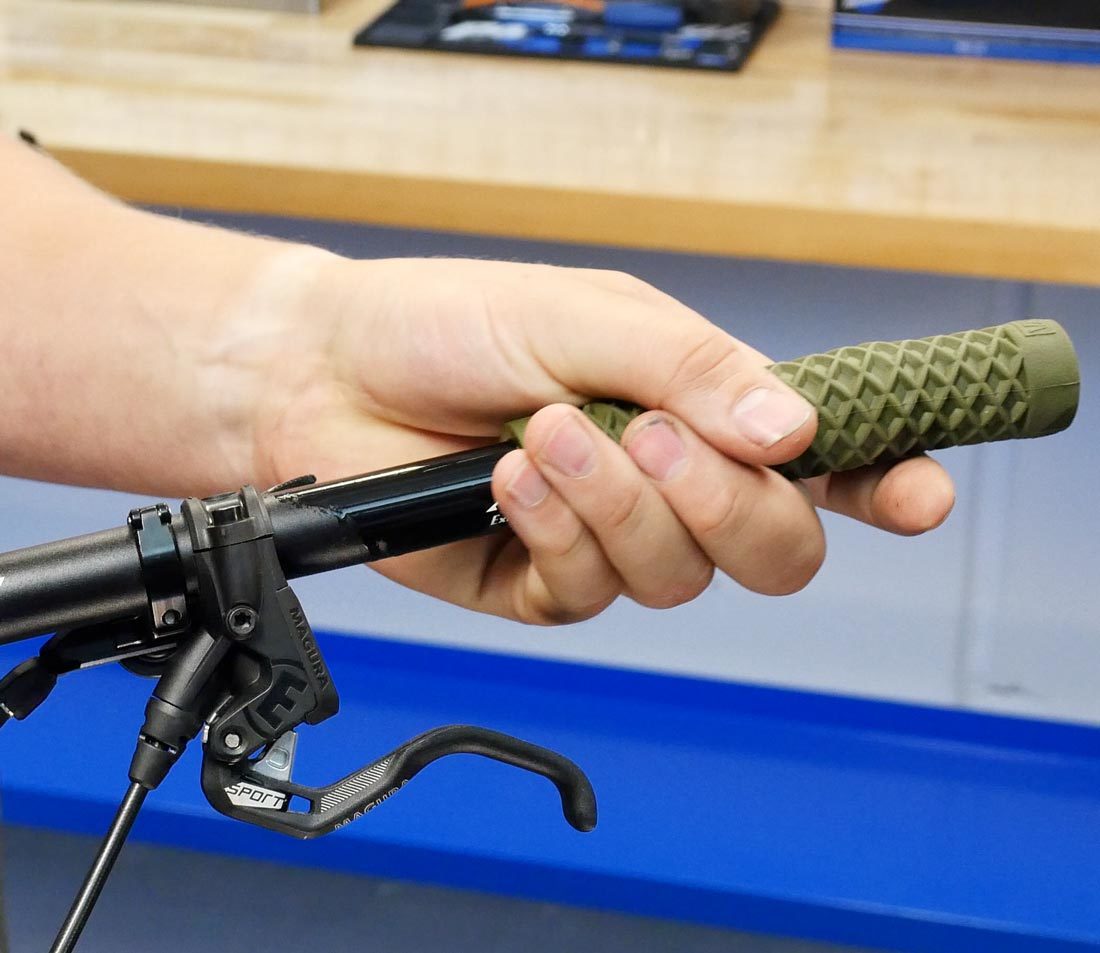
Slip-On Grip
Lock-On Grip
ii
Grip Removal
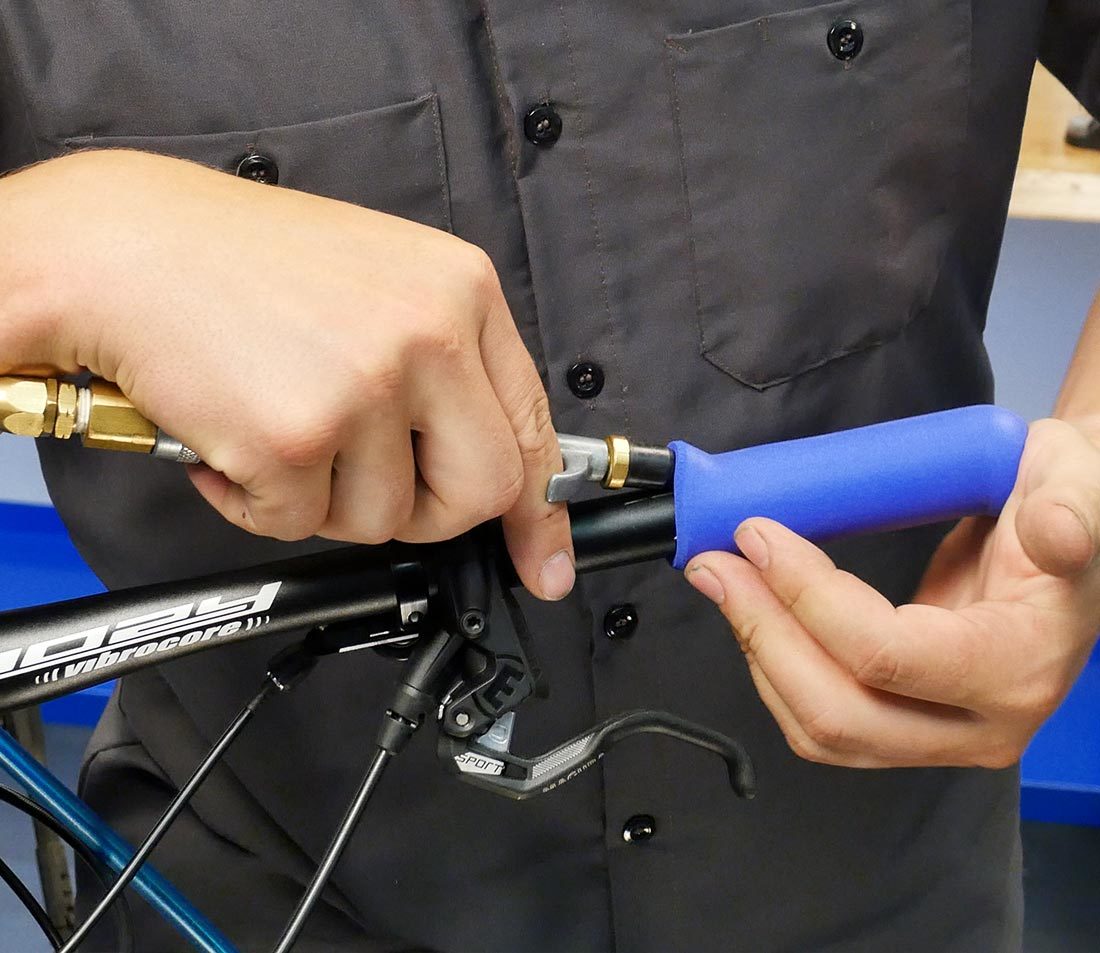
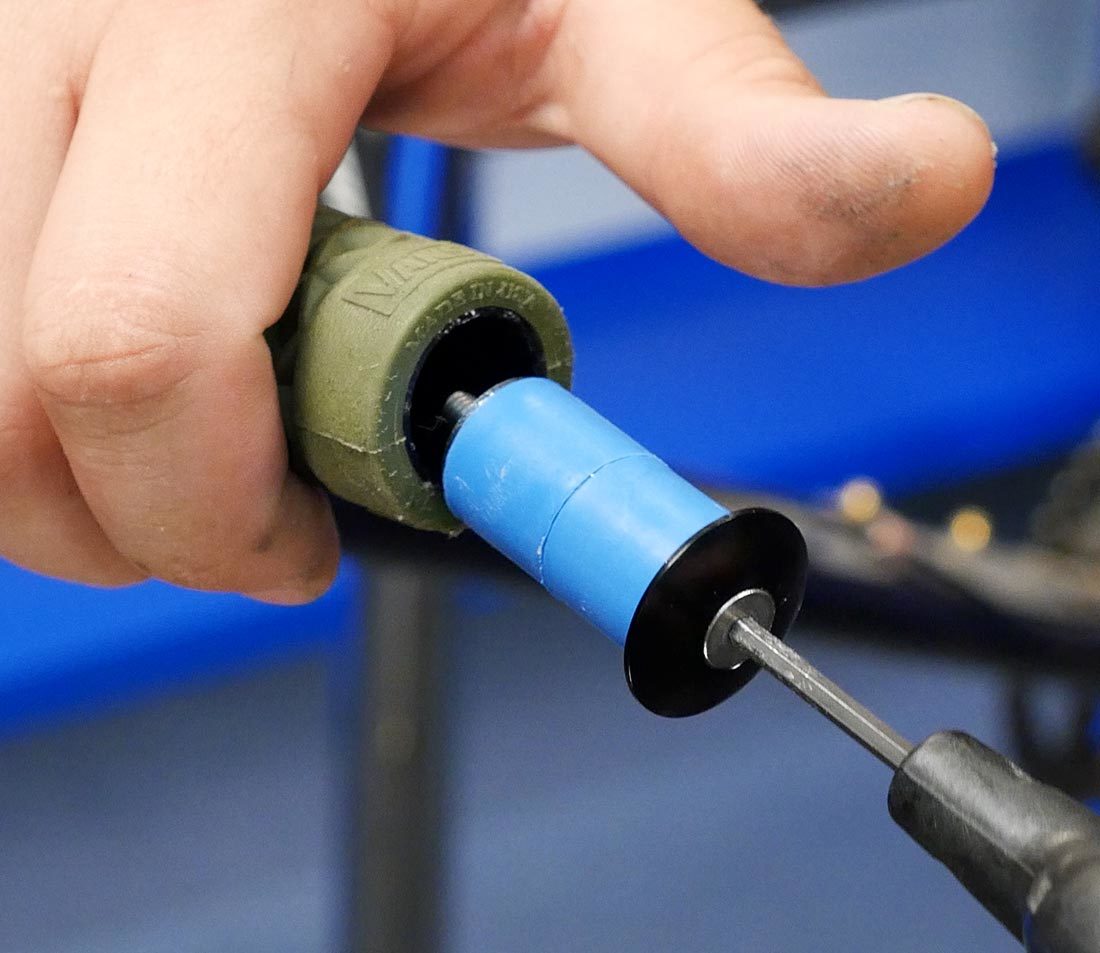
Before removing the grip, remove any bar-end plugs if nowadays. They tin usually be pried out with a small screwdriver. Some designs use an expansion plug system. Loosen with the appropriate wrench and remove the plug.
Traditional plugs can be simply pried out
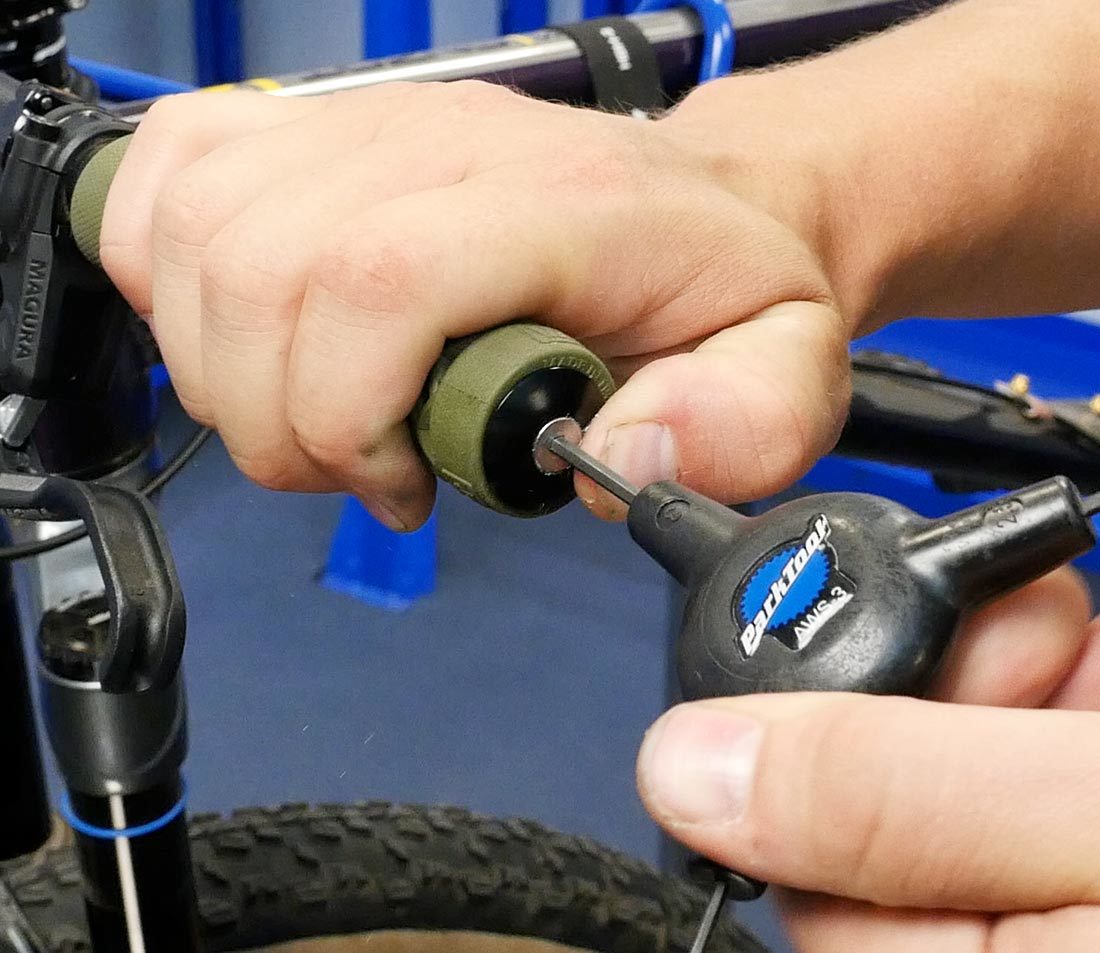
Expansion plugs must exist loosened to remove
Slip-On Grip Removal
Several methods can be used to remove slip-on grips:
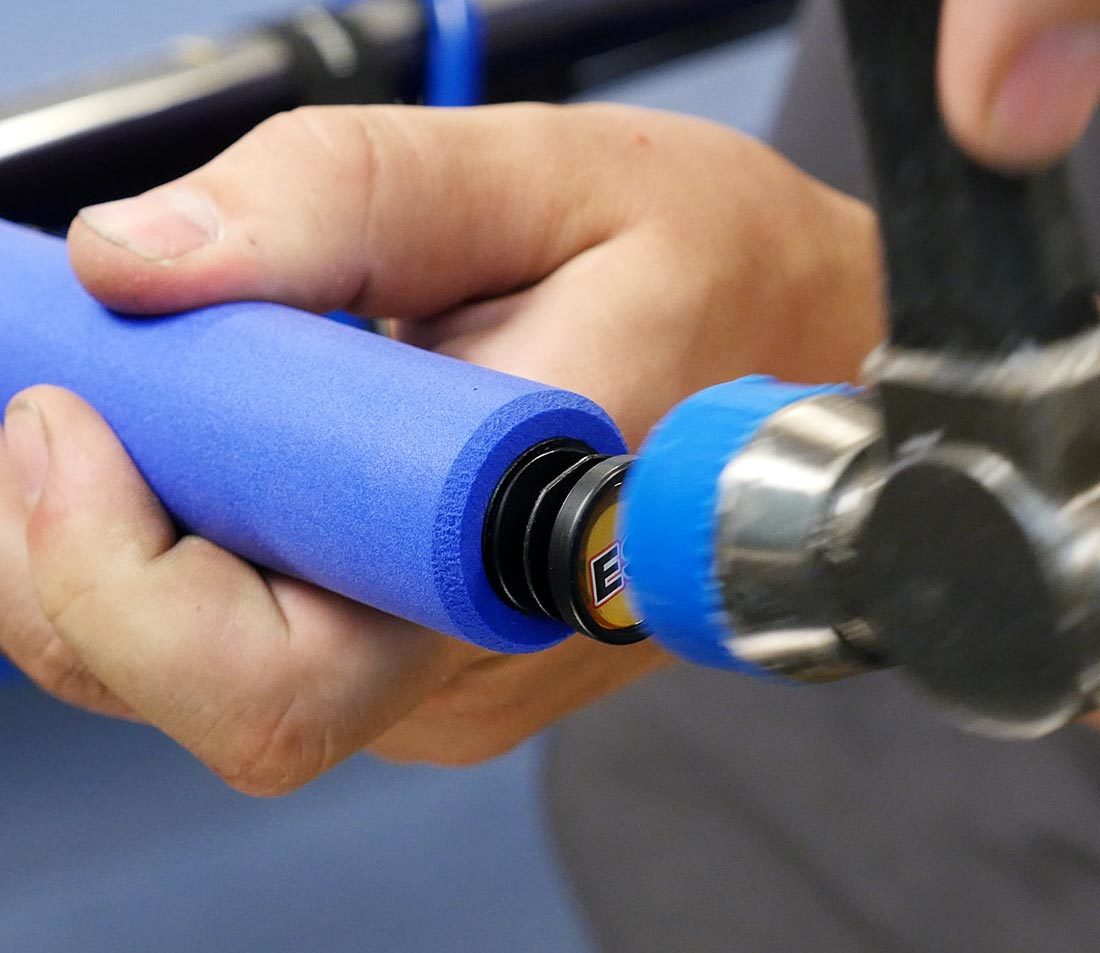
- An air compressor with the appropriate accompaniment can be used to create an air gap between the bar and grip. Twist and jerk the grip to remove it.
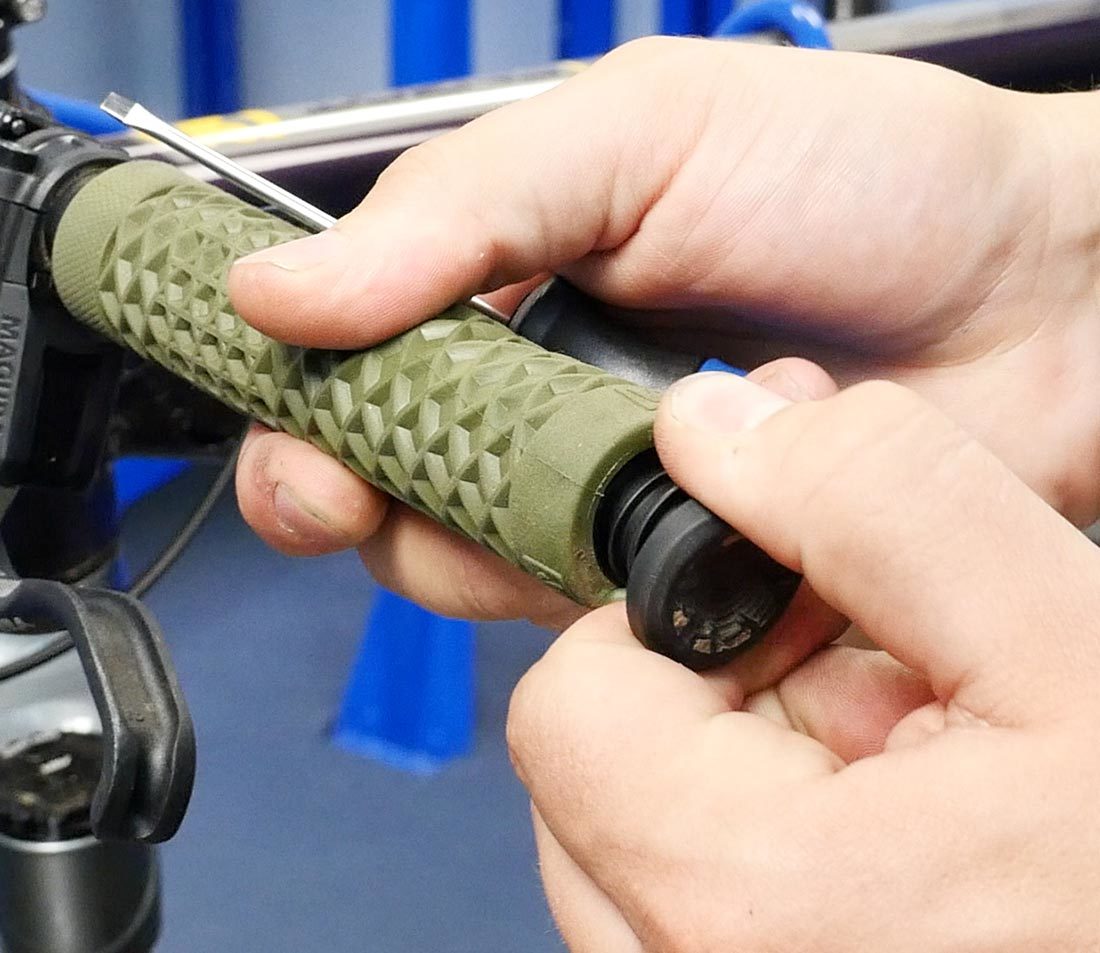
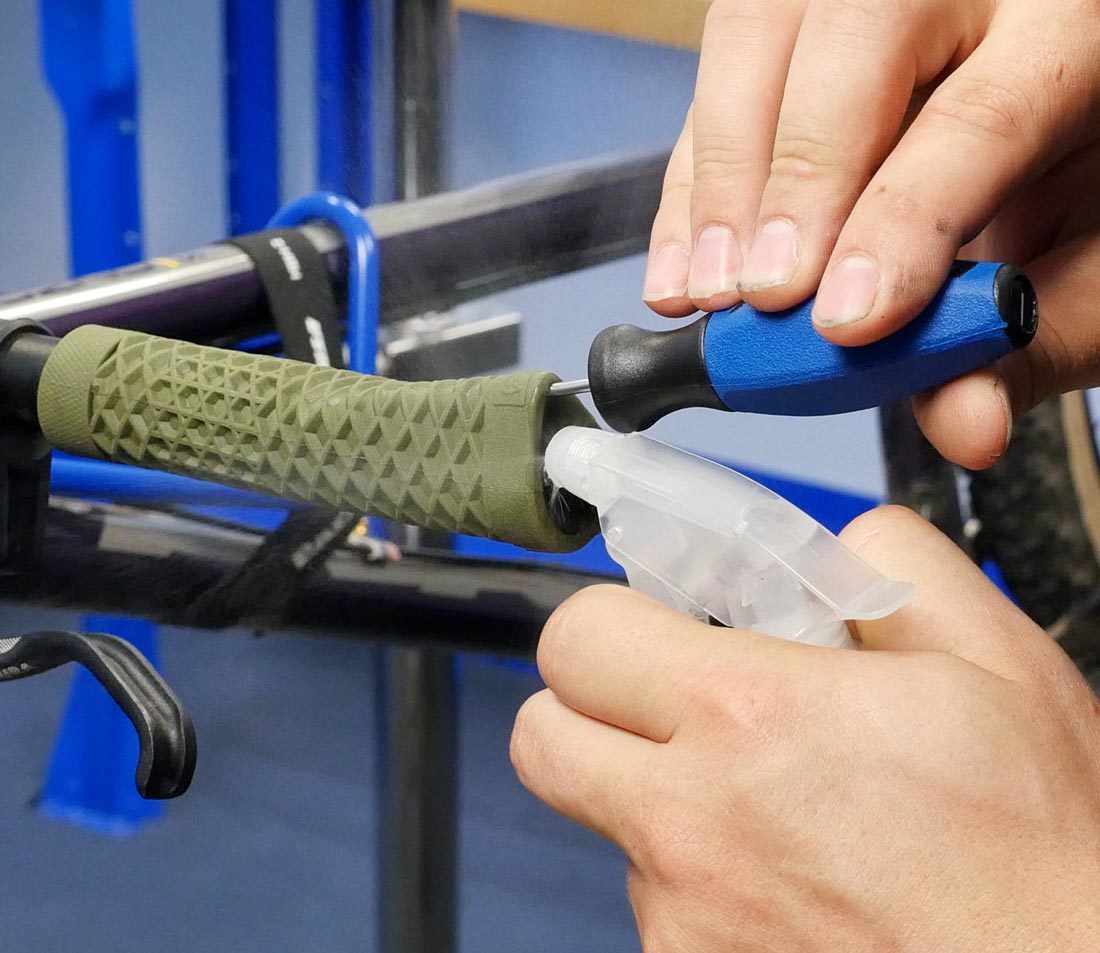
- Use a tool to open one end of the grip and spray rubbing alcohol within. This will act as a lubricant, allowing them to slide off.
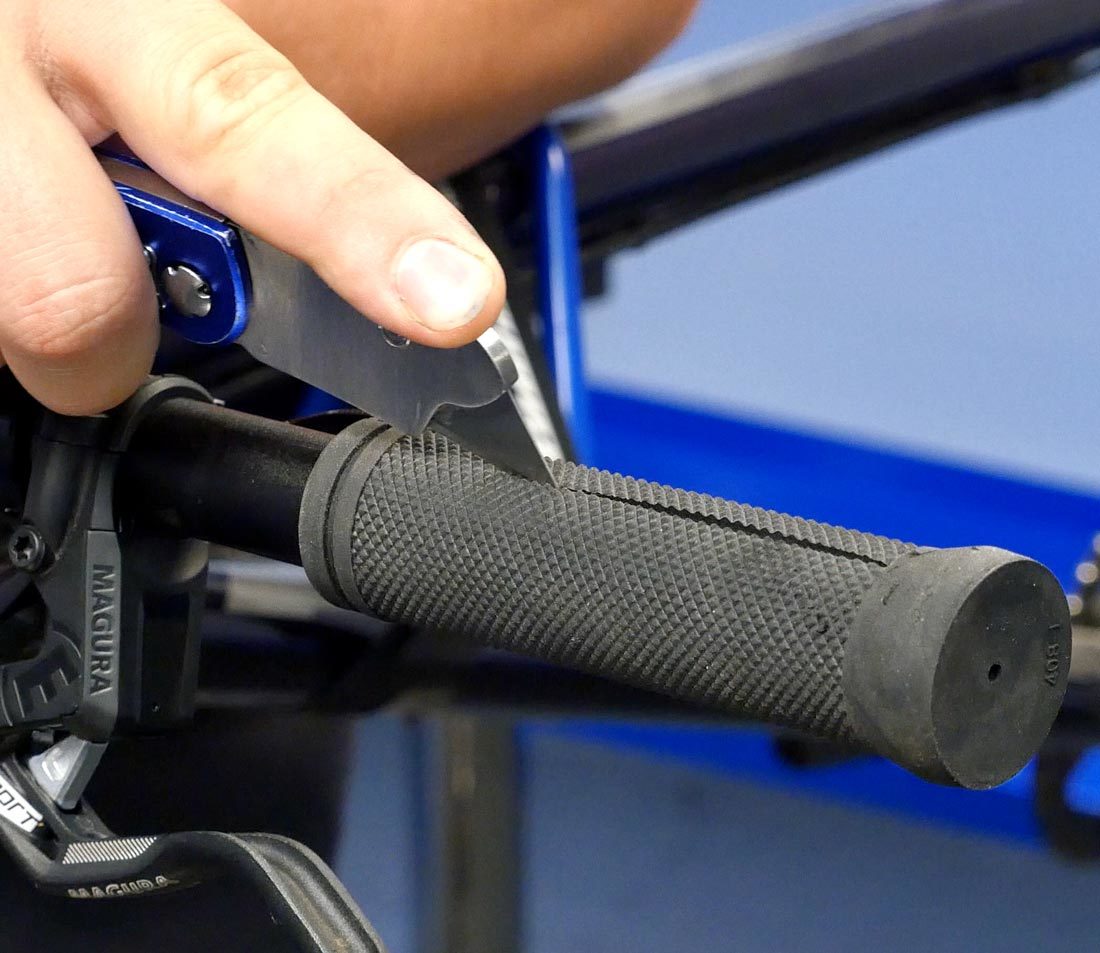
If other methods neglect, cutting through the grip with a pair of scissors or a blade. Do not effort this method with carbon fiber bars, as scoring the surface volition weaken the handlebar. Scoring steel or aluminum will simply cause cosmetic damage.
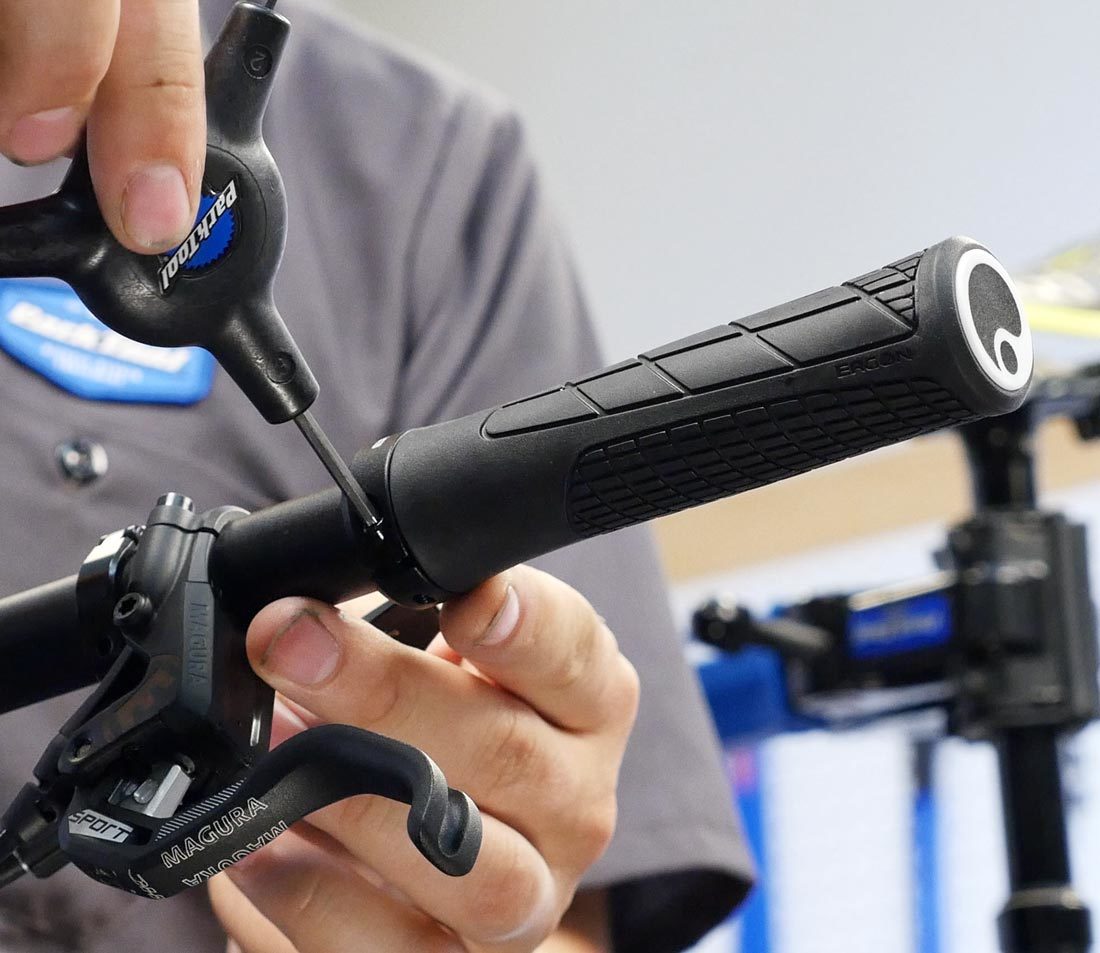
Lock-On Grip Removal
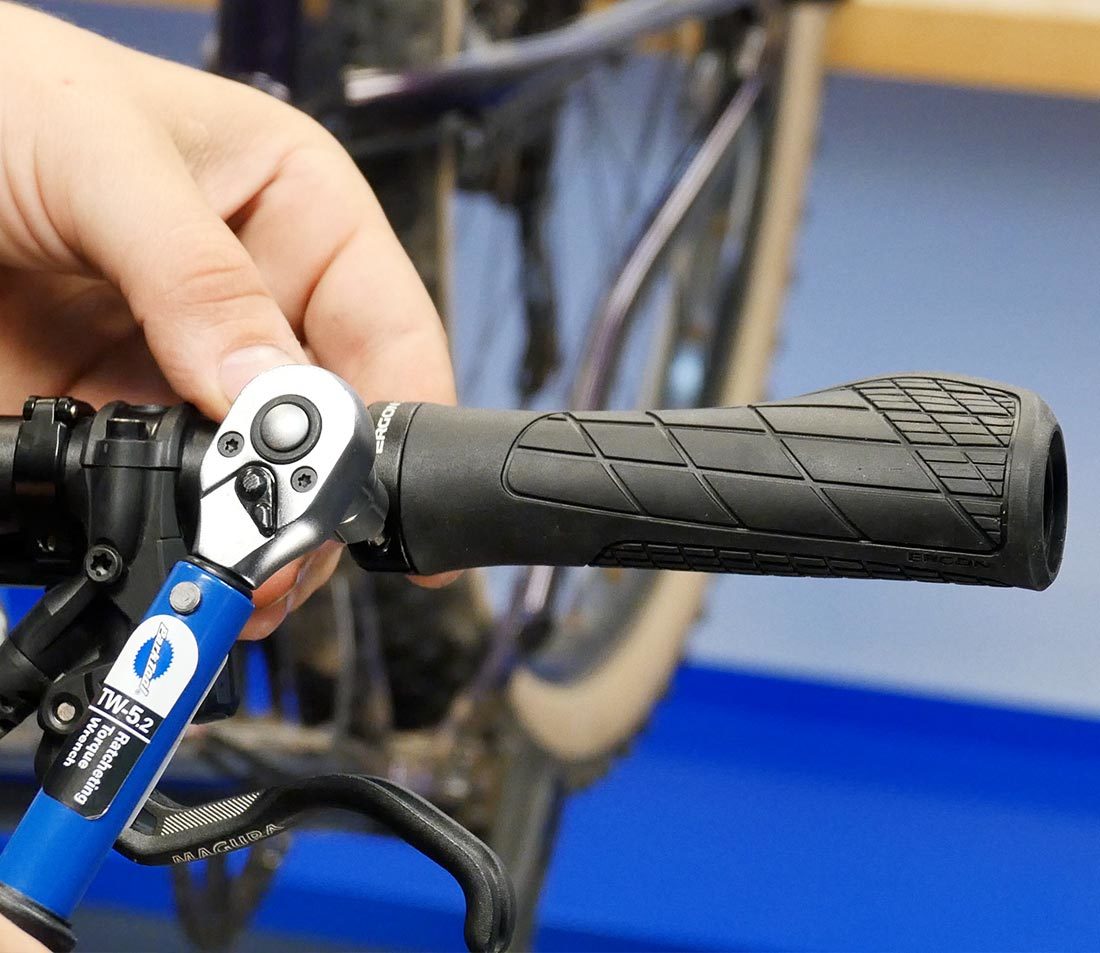
Just loosen the bolts that are clamping the grip to the bar. These are typically a ii.five, 3, or 4mm hex fitting.
iii
Grip Installation
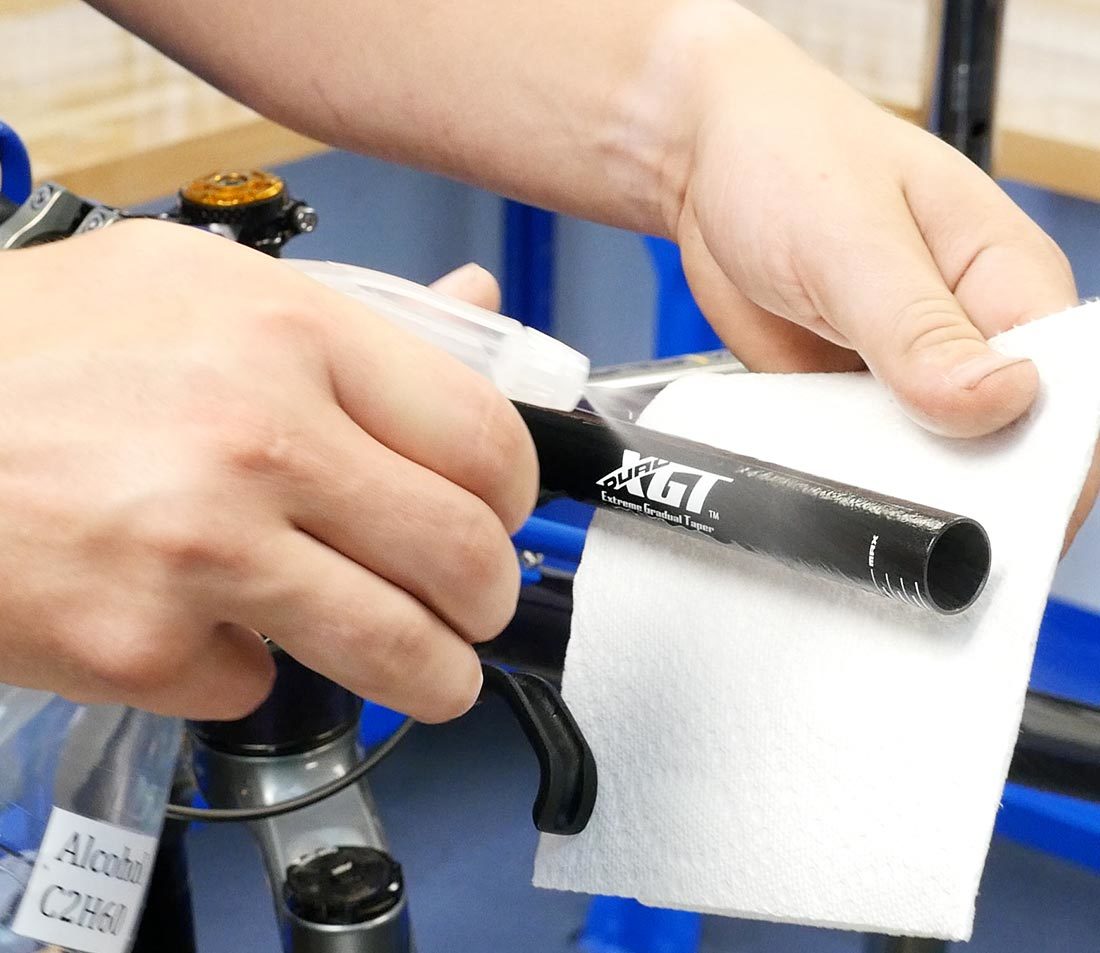
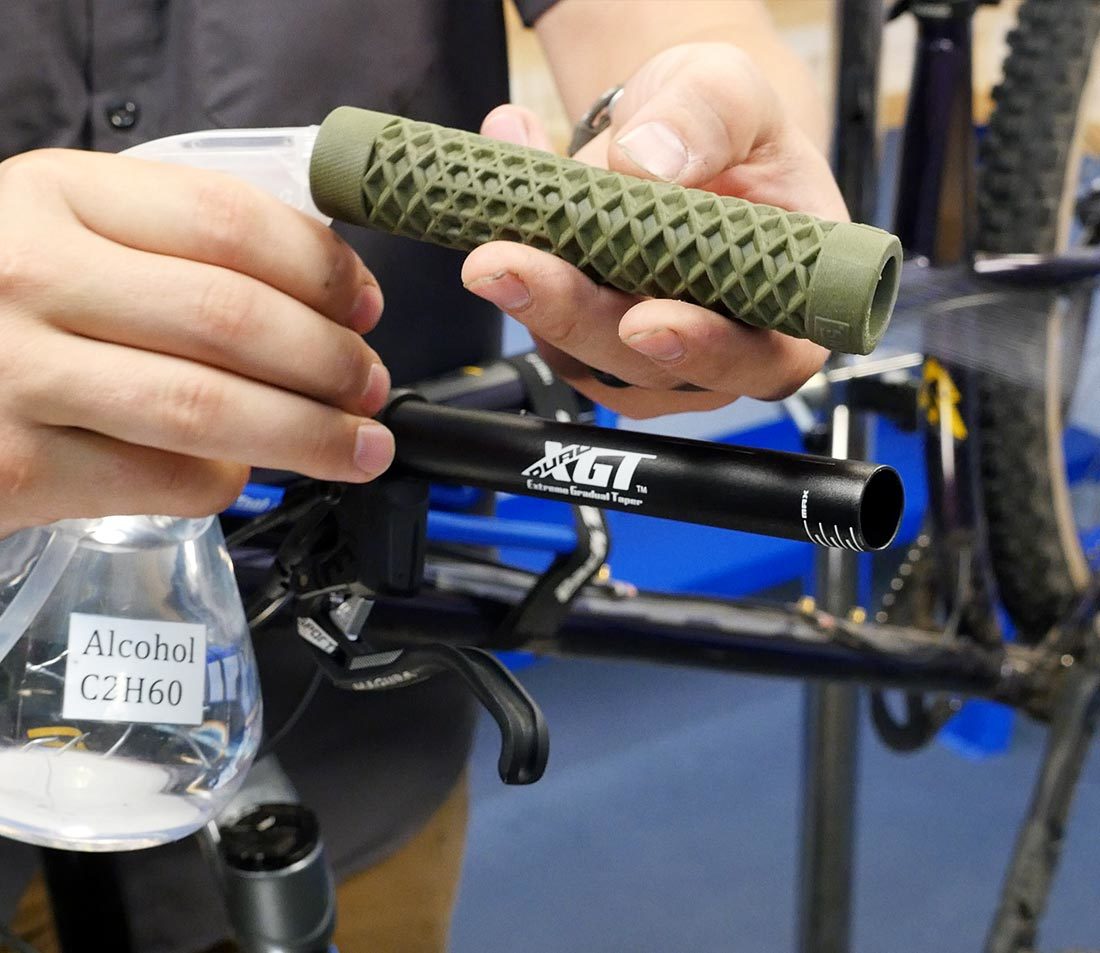
Showtime, clean the bar off with a nonresidual cleaner like isopropyl alcohol to ensure that the bar is free of contaminants and oils.
Slip-On Grip Installation
It can be challenging to slip the new grips onto the bar, particularly with tight fitting styles.
- Blowing air between the bar and grip tin be helpful when working the grips on.
- Similar to the removal process, alcohol can be used as a lubricant. Spray within the grip and onto the bar, and slide the grip onto the bar. Be sure to wait until the alcohol has fully evaporated before riding the bike — this may have a few hours.
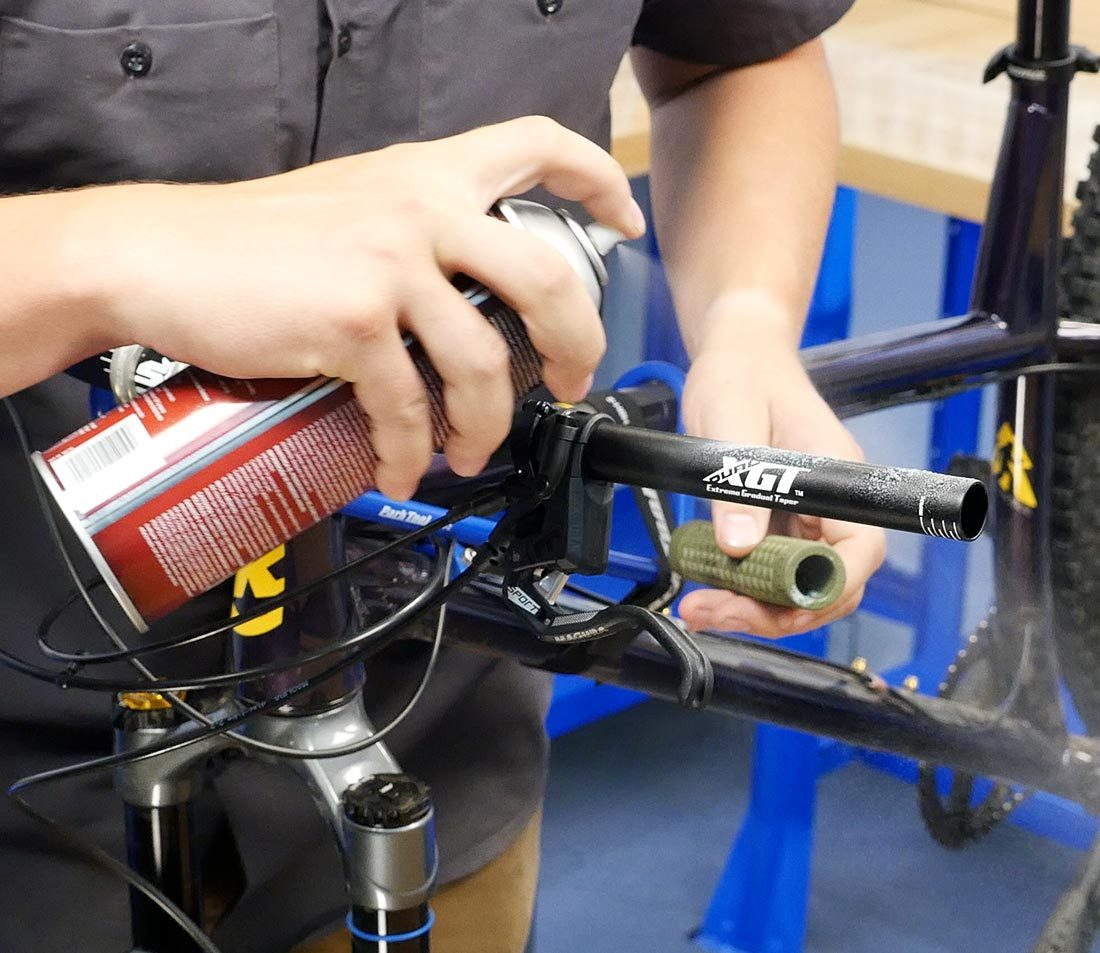
- Finally, adhesive spray can also be used as a lubricant, and will help adhere the grip to the bar once dry. Hairspray can also exist used for this purpose. It may have a day or so for some adhesives to fully dry.
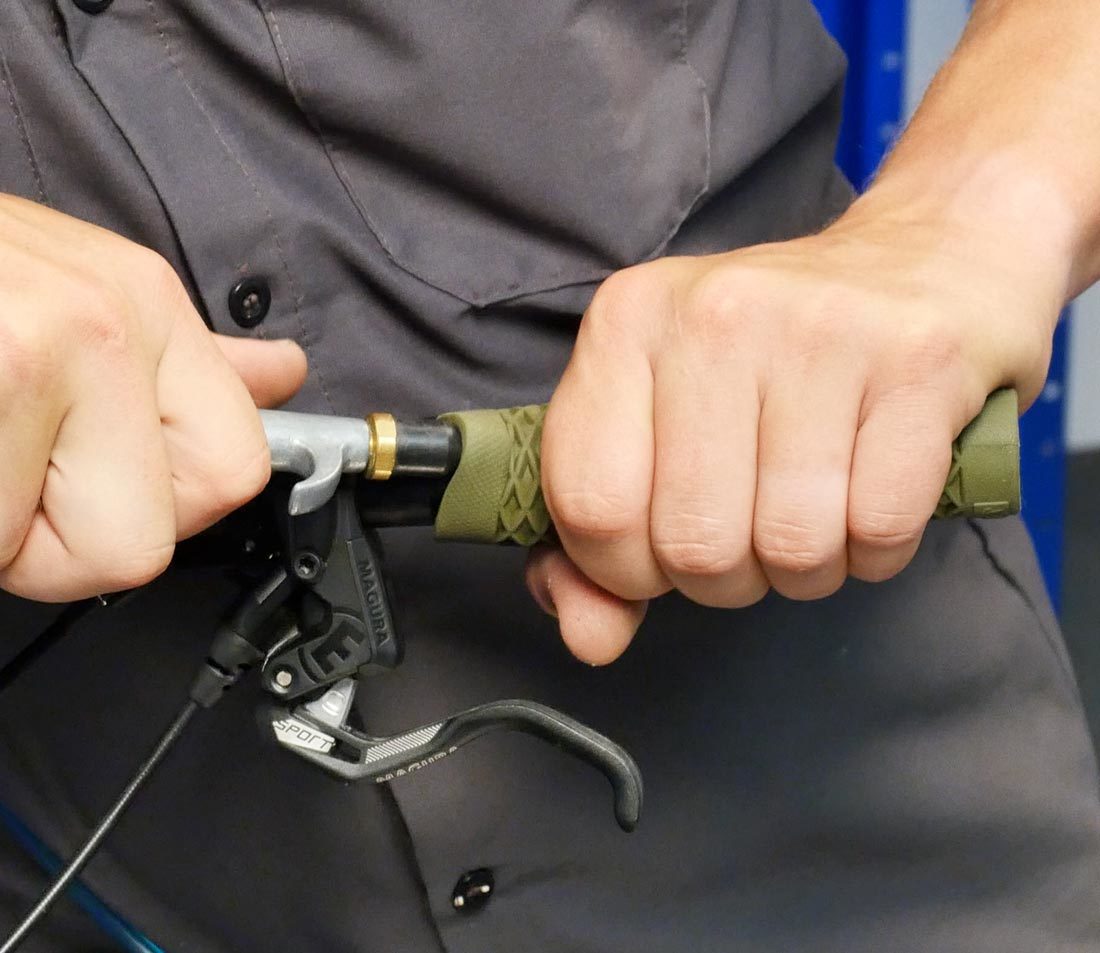
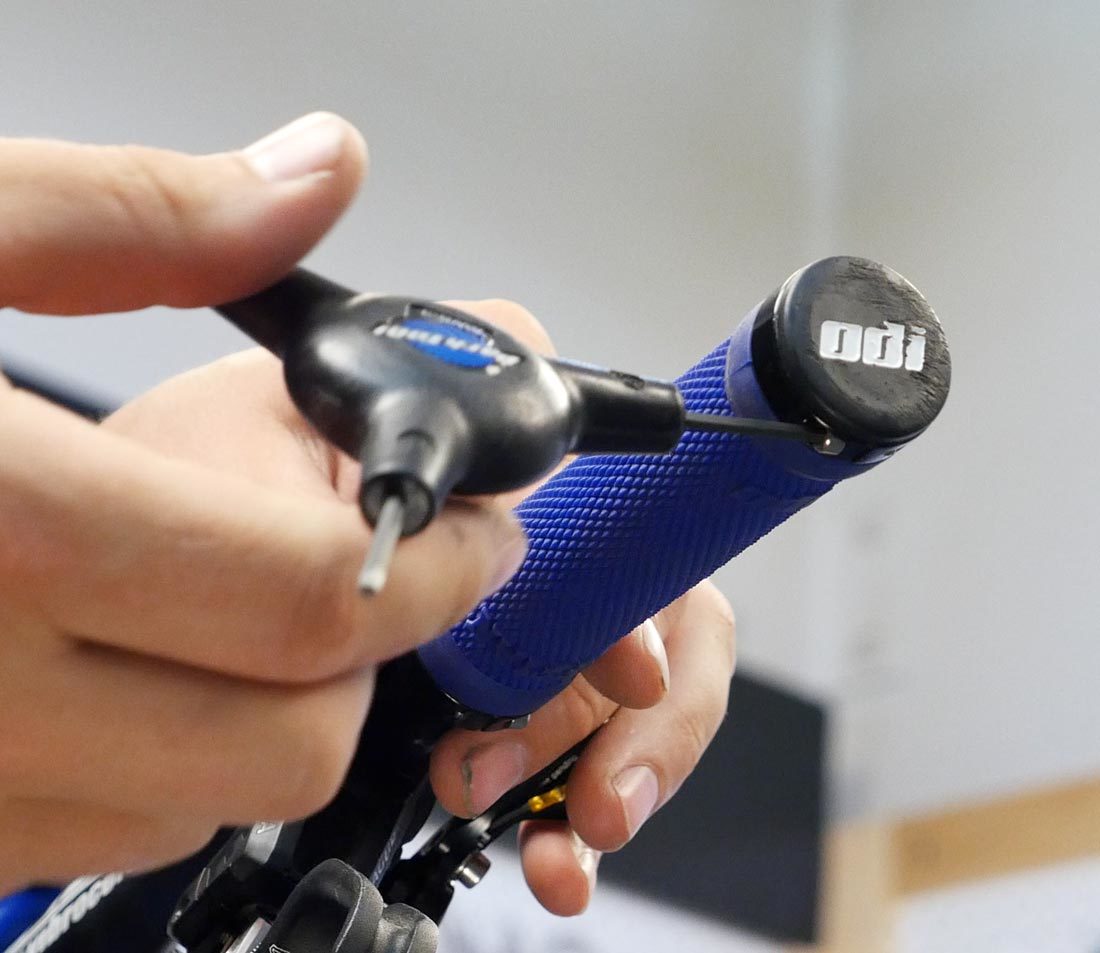
Lock-On Grip Installation
But slide the grip on, orient the grip where yous like it, and torque the bolts to the manufacturer's stated torque value.
Bar End Plug Installation
Once y'all have the grips on, install the bar end plugs. These are an of import part of your bicycle and should exist considered a prophylactic item. Bar end plugs are normally be pressed in by manus. If they are stubborn, the can be gently tapped in with a hammer. In the case of expansion plugs, install into the bar and snug the bolt.
Strike the plug with only enough force to seat it in the bar
Many bar end expansion plugs do not take a torque spec — typically "snug" is sufficient
Source: https://www.parktool.com/en-us/blog/repair-help/handlebar-grip-installation-flat-bars
0 Response to "How To Put On Bike Handlebar Grips"
Post a Comment